ubuntu下定制Vim/Gvim及使用技巧
时间:2022-04-03 11:23
vim是linux下的编辑器之神,是玩linux的必备工具,同样emacs是神的编辑器,两个编辑器是各有千秋,看个人的喜好,青菜萝卜各有所爱。我是比较喜欢vim,用vim编写bash,perl,python脚本,以及修改配置文件等等,本文就主要介绍在下gvim环境的搭建,希望对大家有所帮助。
一. Ubuntu安装gvim方法
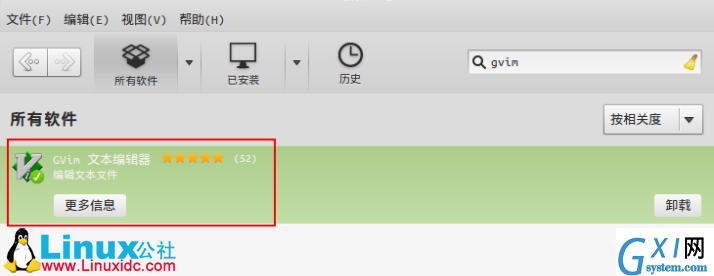
安装gvim的方法,最简单方法是在Ubuntu软件中心搜索gvim,然后点击安装即可,如下图:
 如果使用命令行可以打开终端,输入sudo apt-get install vim-gtk vim-doc cscope
二. 安装gvim常用插件
安装好gvim后就可以使用了,不过在用gvim编写代码的时候还是有点小不方便,比如代码的颜色高亮,自动补全,自动添加相关函数注释,工程管理等等。这些都不必担忧,gvim有很多的插件可以满足上面的功能,甚至更多,下面我安装的是我常用的一些插件。
Gvim插件可以到下面的网址自行选择喜欢的插件:
taglist.vim插件:该插件是查看源代码的结构等,支持C/C++,java,php等多种语言。
安装方法:
下载taglist.zip,解压到$HOME/.vim目录中;
进入$home/.vim/doc目录下,运行vim,输入:help tags,启用taglist的帮助文档;
重启gvim,运行:TlistToggle启用taglist
具体步骤:
创建$HOME/.vim目录
-
-pc:~$ mkdir .vim
下载并解压到.vim目录中
- -pc:~$ cd .vim/
- -pc:~/.vim$ unzip /home/test/下载/taglist_45.zip
- Archive: /home/test/下载/taglist_45.zip
- inflating: plugin/taglist.vim
- inflating: doc/taglist.txt
进入到doc目录,并运行vim
- -pc:~/.vim$ cd doc/
- -pc:~/.vim/doc$ vim
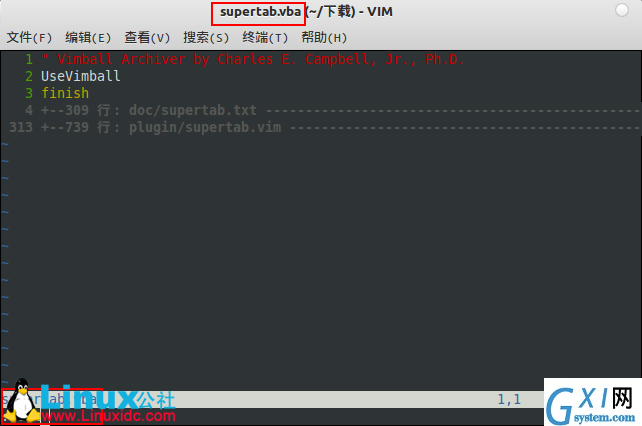
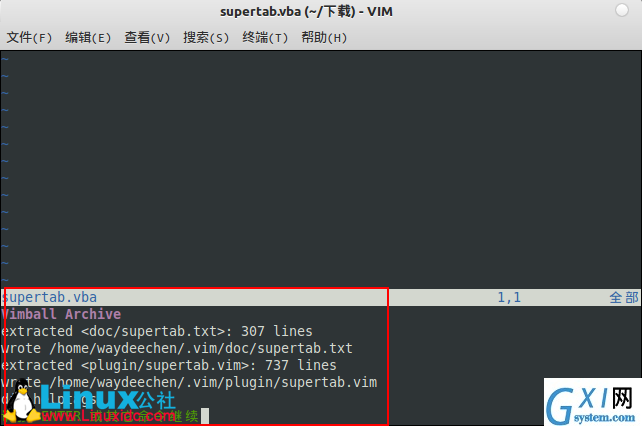
supertab插件:
安装步骤:
1. 下载该插件,下载地址:
2.用vim打开supertab.vba文件,并使之生效:so %,如图:
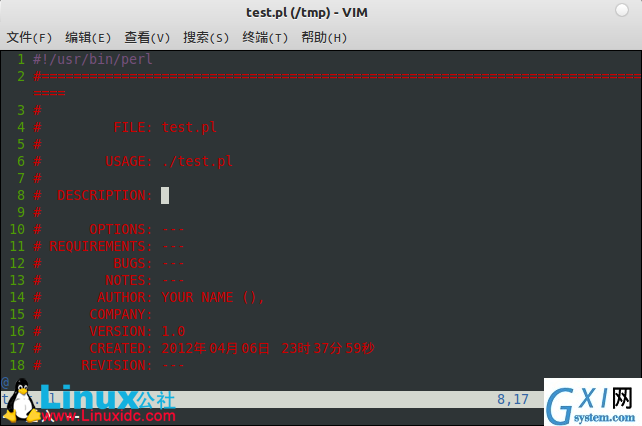
perl-support.vim插件:
安装方法:
下载插件,下载地址:
将perl-support.zip解压到$HOME/.vim目录下
- -pc:~/.vim$ unzip /home/linuxpc/下载/perl-support.zip
- Archive: /home/linuxpc/下载/perl-support.zip
- inflating: doc/perlsupport.txt
- inflating: README.perlsupport
- creating: ftplugin/
- inflating: ftplugin/pod.vim
- inflating: ftplugin/perl.vim
- creating: autoload/
- inflating: autoload/perlsupportregex.vim
- inflating: autoload/perlsupportgui.vim
- inflating: autoload/perlsupportprofiling.vim
- inflating: plugin/perl-support.vim
- creating: perl-support/
- creating: perl-support/modules/
- inflating: perl-support/modules/perl-modules.list
- creating: perl-support/templates/
- inflating: perl-support/templates/Templates
- inflating: perl-support/templates/idioms.template

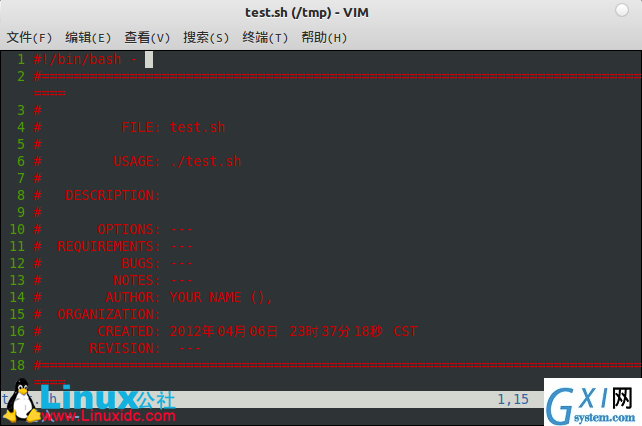
bash-support.vim插件
与perl-support类似的一款插件,bash-support.vim插件,这两个插件的功能类似
安装步骤:
下载插件,并解压到$HOME/.vim目录中
下载地址:
解压到目录下:
- -pc:~/.vim$ unzip /home/waydeechen/下载/bash-support.zip
- Archive: /home/waydeechen/下载/bash-support.zip
- inflating: README.bashsupport
- inflating: doc/bashsupport.txt
- inflating: ftplugin/sh.vim
- creating: bash-support/
- creating: bash-support/templates/
- inflating: bash-support/templates/Templates
- inflating: bash-support/templates/bash.paramsub.template
- inflating: bash-support/templates/bash.statements.template
- inflating: bash-support/templates/bash.comments.template
- creating: bash-support/codesnippets/
- inflating: bash-support/codesnippets/timestamp

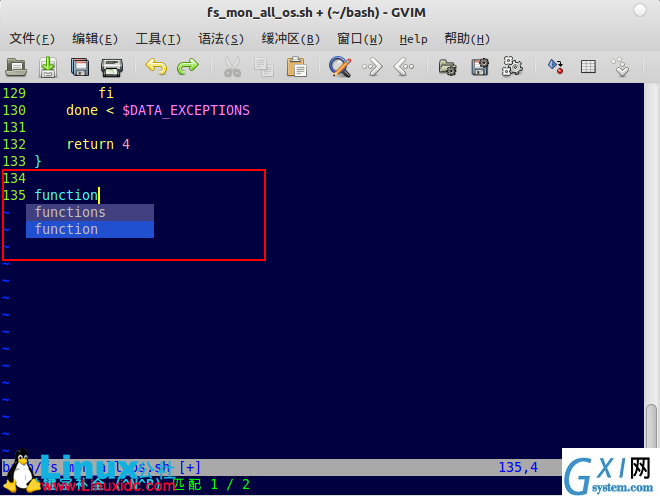
AutoComplPop插件
AutoComplPop可以打开自动补全的窗口,不单单可以补全变量函数等,还可以补全文件名。
下载地址:
安装方法很简单,将下载的文件解压到$HOME/.vim目录中
使用效果图:

最后晒下自己的.vimrc文件:
- set backspace=indent,eol,start
- set history=50 " keep 50 lines of command line history
- set ruler " show the cursor position all the time
- set showcmd " display incomplete commands
- set incsearch " do incremental searching
- set number
- syntax on “打开语法高亮
- set autoindent “自动缩进
- set smartindent “使用c形式自动缩进
- set cindent
- set tabstop=4 “TAB键的宽度
- set shiftwidth=4 “统一缩进为4
- set showmatch “高亮显示匹配括号
- set incsearch
- set nu “显示行号
- color darkblue ”颜色方案
- set ruler
- set ignorecase “搜索忽略大小写
- set smartcase
- set hlsearch ”设置搜索字符高亮
- set report=0
- set mouse=a
- set nobackup
- set noeb
- set history=1000
- set nobackup
- set noswapfile
- set enc=utf-8 ”语言编码设置
- set fencs=utf-8,ucs-bom,shift-jis,gb18030,gbk,gb2312,cp936
- set langmenu=ZH_CN.UTF-8
- set helplang=cn
- set laststatus=2
- set ruler “显示光标位置状态行
- set cmdheight=1 ”设置命令行的高度
- filetype on “侦测文件类型
- filetype plugin on ”载入文件类型插件
- filetype indent on
- set viminfo+=! “保存全局变量
- set iskeyword+=_,$,@,%,#,- ”带有这些字符的单词不要被换行分割
- set linespace=0 “字符间插入像素行数目
- set wildmenu ”命令行自动完成操作
- set backspace=2 “使用回格键
- set whichwrap+=<,>,h,l ”允许backspace和光标跨越行
- set selection=exclusive
- set selectmode=mouse,key
vim常用使用方法:
:e:打开文件,例::e /opt/shell/status.sh
ZZ: 关闭文件
vim +18 /opt/status.sh :打开status.sh并跳到第18行
- vim +18 /opt/status.sh :打开status.sh并跳到第18行
- 13
- 14 ########## DEFINE FUNCTIONS ##########
- 15
- 16 function in_range_random_number()
- 17 {
- 18 #create a random number which is less than or equal to UPPER_LIMIT
- 19 RANDOM_NUMBER=$(( $RANDOM % $UPPER_LIMIT + 1 ))
- 20 echo -e "$RANDOM_NUMBER"
- 21 }
- 14 ########## DEFINE FUNCTIONS ##########
- 15
- 16 function in_range_random_number()
- 17 {
- 18 #create a random number which is less than or equal to UPPER_LIMIT
- 19 RANDOM_NUMBER=$(( $RANDOM % $UPPER_LIMIT + 1 ))
- 20 echo -e "$RANDOM_NUMBER"
- 21 }
- 22
vim +/RANDOM_NUMBER /opt/shell/random_passwd_create.sh:打开脚本并从头开始查询,到第一个匹配模式的地方
vim +?RANDOM_NUMBER /opt/shell/random_passwd_create.sh 从文件尾搜索
- vim +/^# /opt/shell/random_passwd_create.sh
- 160
- 161 ########## start of main ##########
- 162
- 163 trap `trap_exit;exit 2` 1 2 3 15
- 164
- 165 check_for_and_create_keyboard_file
7. 将文件部分写入另一个文件
- :5,15w /tmp/hshhs
8. 删除空行
- :g/^$/d
9. vimdiff 命令
10.vimgrep命令
更多相关信息见 专题页面


本类排行
今日推荐


热门手游
-
像素火影破解版

版本:v1.00.42
大小:222.66MB
日期:2024-05-18
-
谁先阵亡2完整版

版本:v1.0
大小:75.17MB
日期:2024-05-18
-
闪客连打明日英雄正式版

版本:v1.0
大小:65.31MB
日期:2024-05-18
-
七日重生正式版

版本:v2.6.2
大小:532.92MB
日期:2024-05-18
-
异形探索正式版

版本:v6.6.34
大小:160.63MB
日期:2024-05-18
-
3D超级保龄球大师官方版

版本:v1.1
大小:73.15MB
日期:2024-05-18