02 - 为SQL Server高可用集群搭建故障集群转移
时间:2022-03-16 12:02
This article explores the configuration of Windows failover clusters, storage controllers, and quorum configurations for SQL Server Always On Availability Groups.
Prerequisites
In this series of articles, we will configure the SQL Server Always On Availability Groups from end to end for your learning purpose. We covered the following topics in the previous .
- We installed Oracle Virtual Box with three VM’s
- We did installation of Windows Server 2016 standard edition with desktop experience
- We covered VM network adapter configurations
- We installed and configured domain controller, active directory and DNS
- Assign static IP’s to all VMs
- Join SQL Nodes in the MyDemoSQL.com domain
To follow along better, try to go over these previous articles before proceeding with this one.
Failover Cluster configuration for SQL Server Always On Availability Groups
We require a minimum of two nodes failover cluster for the SQL Server always on availability groups. We can setup AG without cluster as well starting from SQL Server 2017, but it gives you limited AG functionality. It is out of scope topic for this article series.
We prepared the following VMs for our demo purposes.
|
Server Name |
IP address |
Role |
|
VDITest3 |
10.0.2.15 |
Domain Controller and Active Directory |
|
SQLNode1 |
10.0.2.21 |
Primary Node of SQL AG |
|
SQLNode2 |
10.0.2.22 |
Secondary Node of SQL AG |
Now, we have a requirement to set up the Windows failover cluster for SQLNode1 and SQLNode2. To do so, launch Add Roles and Feature Wizard from the server manager. Enable the Failover Clustering feature in both the SQL nodes.

Confirm the failover cluster installation for SQL Server Always On Availability Groups.
Put a tick mark on Failover Clustering and click on Add Features to install the feature with dependency.
Review and confirm the installation. You can see it installs failover Cluster Management Tools along with the Failover Cluster Module for Windows PowerShell.
It quickly installs the features on your respective server.
Once you enabled the feature on both nodes, search and launch failover clustering from the start menu. It currently shows no items found because we haven’t configured the cluster yet.
Before we proceeded further, check the ping response from SQLNode1 to SQLNode2 and vice-versa.
Ping response from SQLNode1 to SQLNode2
Ping response from SQLNode2 to SQLNode1
In case it does not work for you, disable the Windows firewall in both the nodes. Search for Windows Firewall in Start and disable all firewalls.
Note: Please do not disable the firewall in a production environment due to security reasons.
Validate Configurations for SQL Server always on availability groups
Click on the Validate Configurations in the Actions menu. You can read the description for learning purposes.
On the next page, add the nodes you want to add in the failover cluster. Here, I added both nodes for my cluster.
It performs various tests such as cluster configuration, network, Storage and Hyper-V configuration. We can perform limited tests as well, but it is good to perform all tests.
On the next page, it shows the servers for validation and lists down all tests it is going to perform.
It starts validations one by one for all rules. It shows the result of each test, whether passed, failed or any warnings.
You can review the result of all test parameters in a cluster. Once reviewed, put a check on the Create the cluster now using validated nodes… It does not allow any additional nodes at this point. If you want, you can finish the process and revalidate the cluster servers.
It launches the Create Cluster Wizard.
On the next page, we define an access point for administrating the cluster. It is a cluster name and cluster IP address.
Give a unique name for the cluster in your environment along with a virtual IP address. It should be in the IP range of the nodes network.
The cluster configuration is now complete. Click Next to start the cluster build process.
It forms the failover cluster from both SQL nodes specified.
Once the process is finished, launch the Failover cluster manager and view the nodes. It should show both nodes in the Up status.
Click on Roles, and it is empty because we have not added any roles yet in this cluster. You can verify the cluster name as SQLAGCLU.MyDemoSQL.com
Enable iSCSI feature on Domain Controller server for SQL Server always on availability groups
In this article, we want to add the cluster storage from the domain controller server. For this purpose, connect to the DC server. Choose the iSCSI Target Server in the Add Roles and Features Wizard.
Here we see, it installed the feature on the domain controller server.
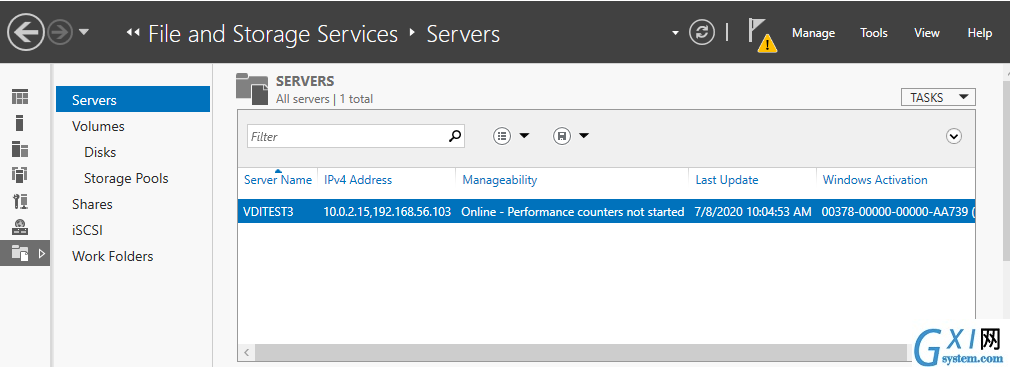
We need to configure the iSCSI target server now. For this purpose, in the server manager, click on the File and Storage Services.
It opens another page with storage options. Click on the iSCSI from the menu located on the left-hand side.
In iSCSI, it does not show any iSCSI virtual disks as now. It shows an option – To create an iSCSI virtual disk, start the New iSCSI virtual Disk Wizard.
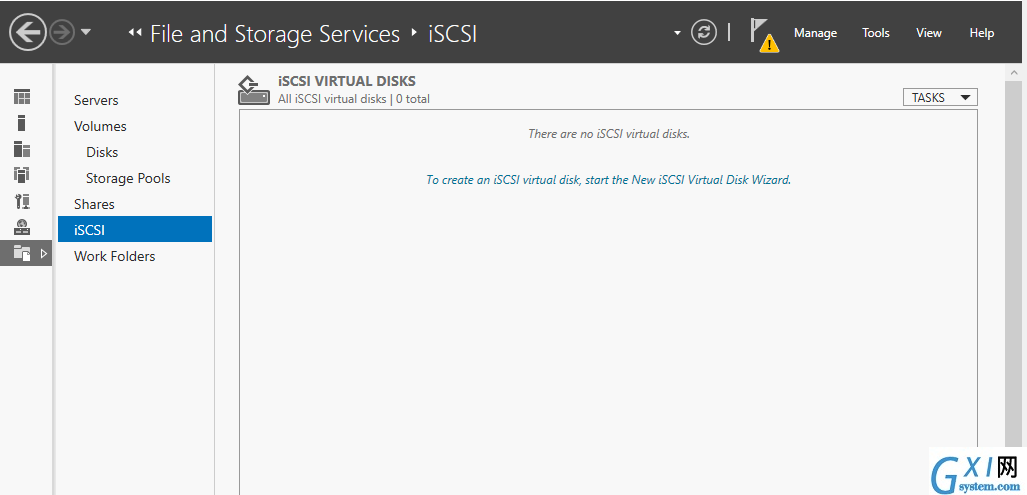
Click on the hyperlink, and it launches iSCSI virtual disk wizard.
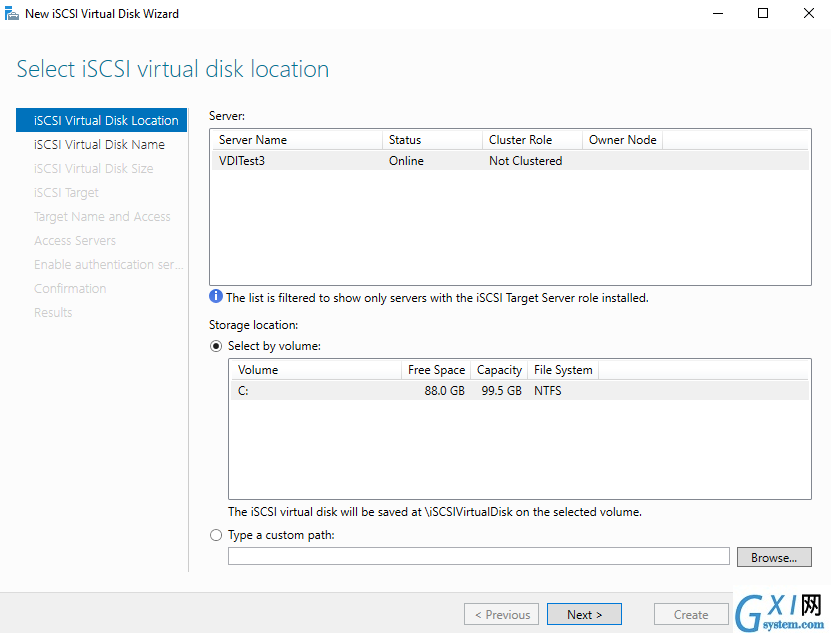
In the Virtual disk location, select the volume. We have only C drive available in the VM, so it shows that drive information including used and free space.
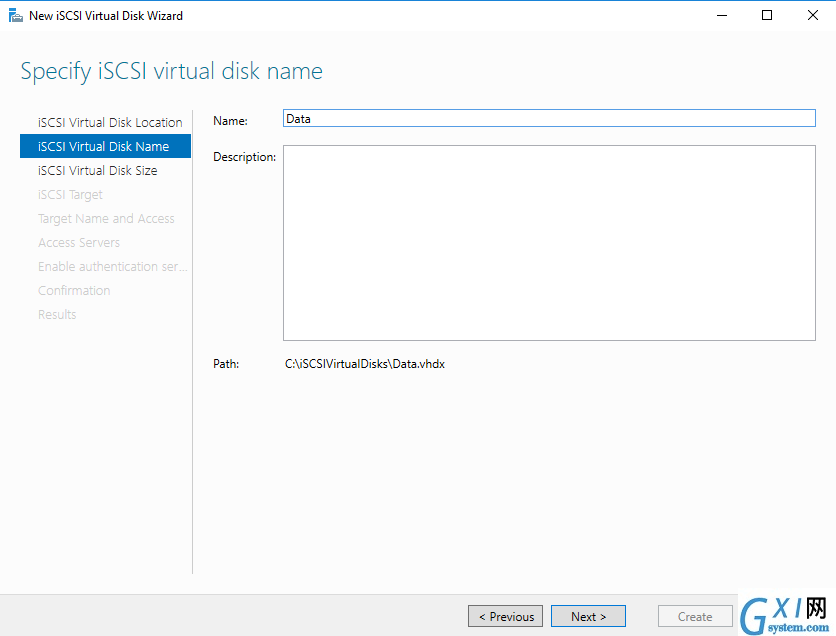
Specify an iSCSI virtual disk name. You can give it any name as per your preference. It creates a .vhdx file in the C:\iSCSI directory.
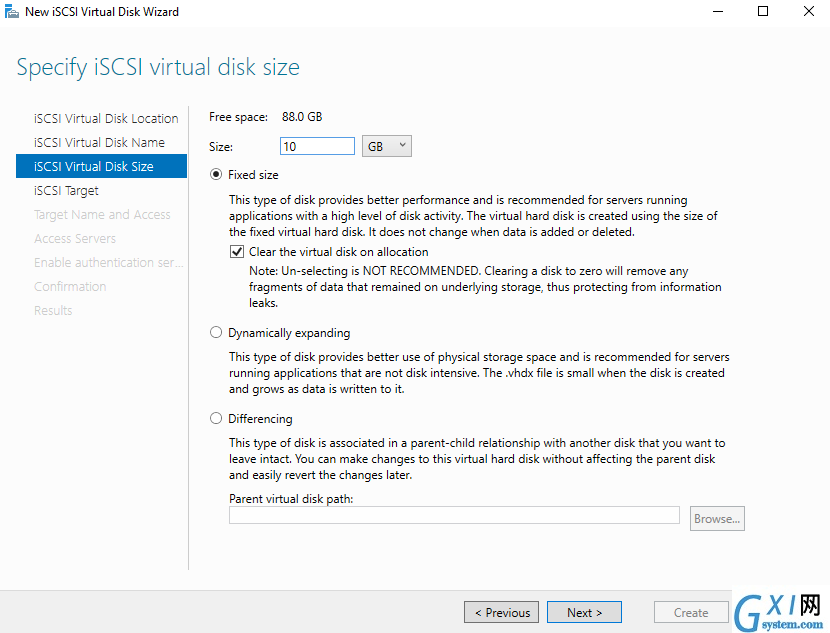
Specify a size for the virtual disk. You can configure a fixed or dynamic size. We should use a fixed size virtual disk for better performance.
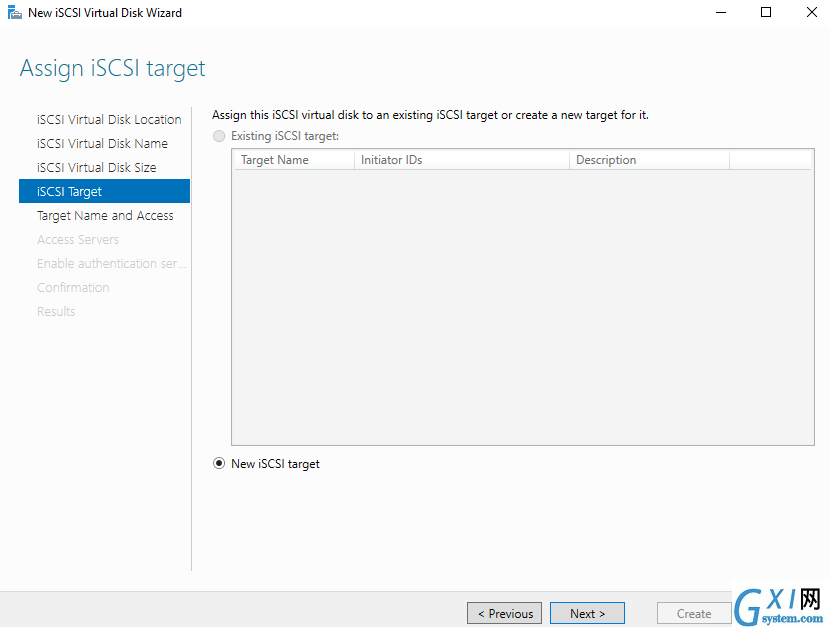
We do not have any existing iSCSI target, so select the option to create a new iSCSI target.
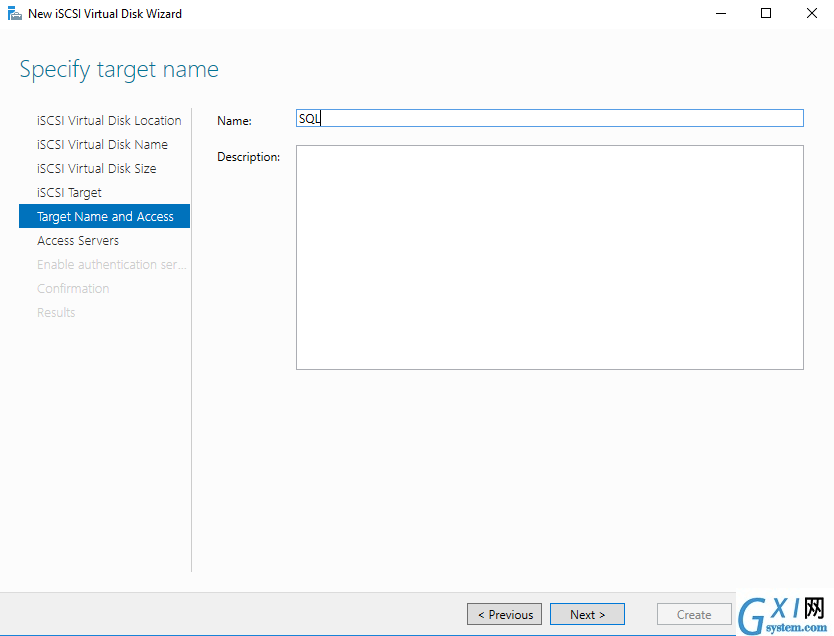
Specify a target name for the iSCSI.
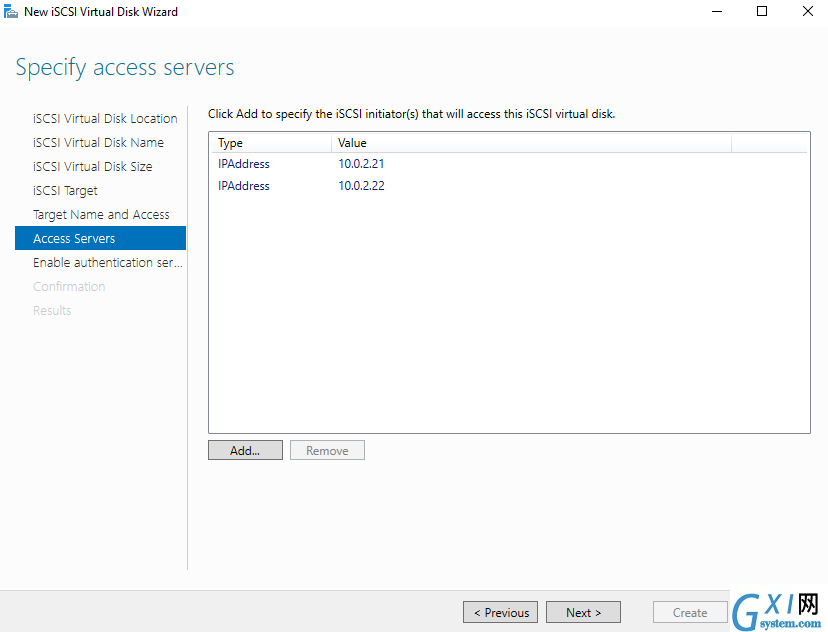
On the next page, we define the servers which will have access to the virtual disk. You can specify the node IP address and add it to the console.
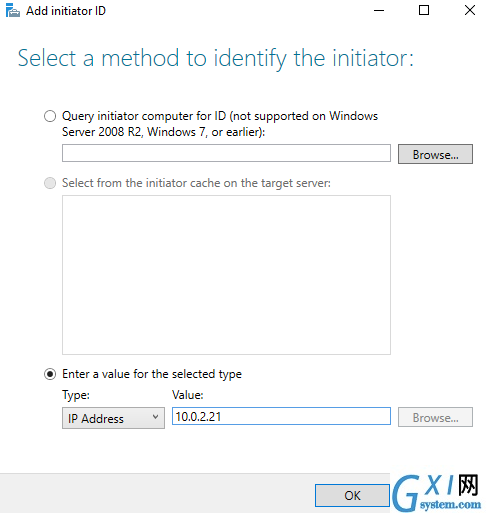
Similarly, search for the SQLNod2 IP address and add it.

We get both SQL Nodes as part of the virtual disk access list.
Click Next and confirm your selections for the iSCSI target.
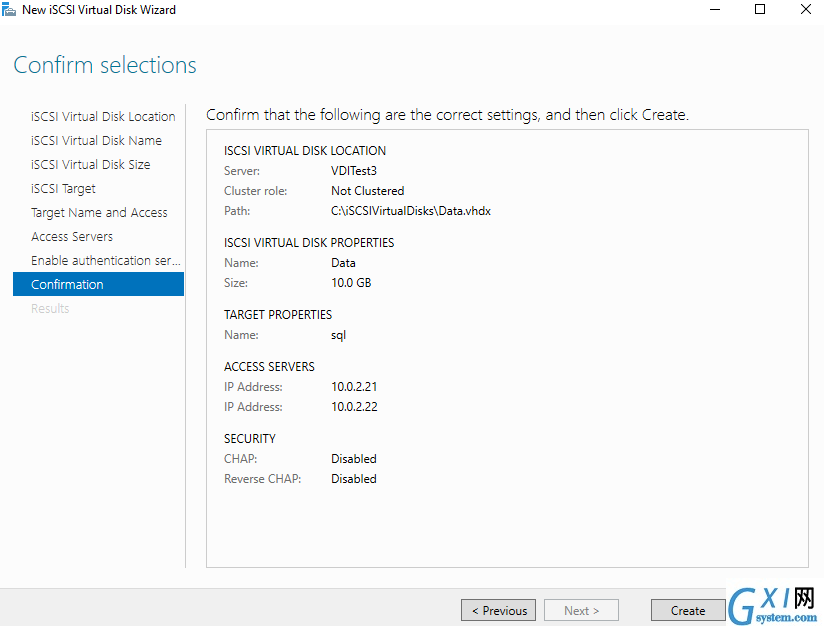
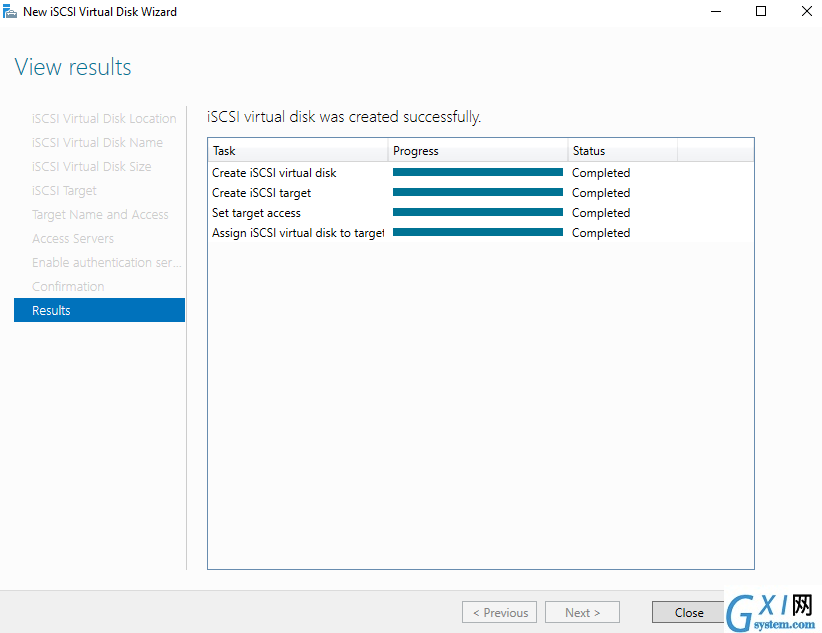
Click Create. We created the iSCSI targets successfully.
We configured the iSCSI target on the domain controller server. We need to use iSCSI initiator wizard on both the nodes to reflect the virtual disks on the failover cluster.
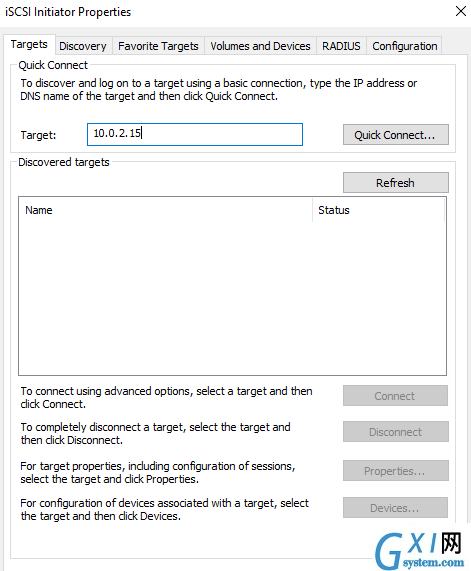
Connect to the SQLNode1 and launch the iSCSI initiator from the Server Manager -> tools -> iSCSI initiator.
In the iSCSI initiator, it asks for an iSCSI target.
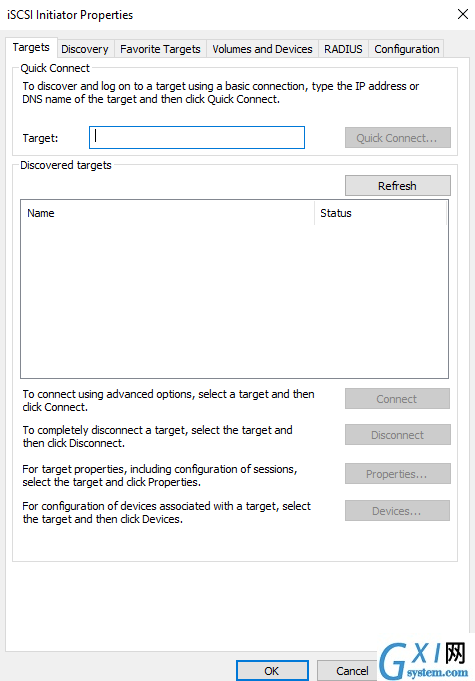
Our iSCSI target is on the domain controller server, so specify the IP address of DC. It is 10.0.2.15 in my case. Click on Quick Connect after specifying the IP address.
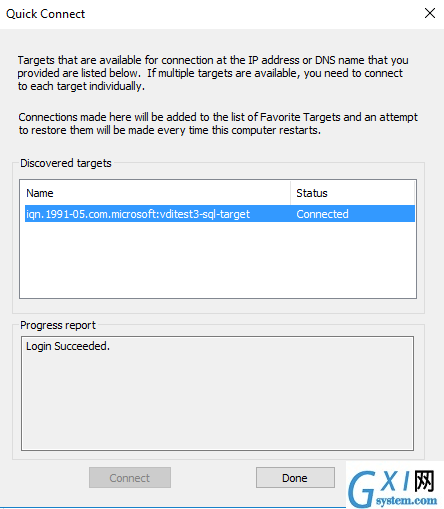
It shows you a list of iSCSI targets available on the specified IP address. We already have configured one iSCSI target, so select the discovered target and click done.
Now, launch the Computer Management and click on Disk Management. In the disk management, it shows you the available Storage.
In the below screenshot, we see a root drive along with a 10 GB unallocated space. It is the same virtual disk of 10 GB that we configured earlier.
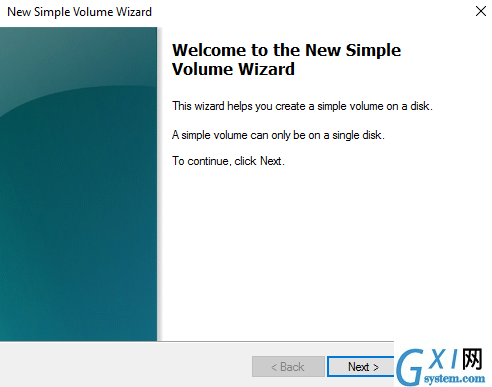
Right-click on this disk and choose New Simple Volume. It opens the simple volume configuration wizard.
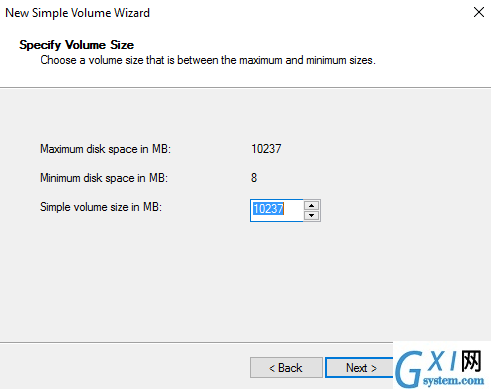
In the volume size, we can specify a different size for the volume, but it cannot exceed the virtual disk maximum size we specified earlier.
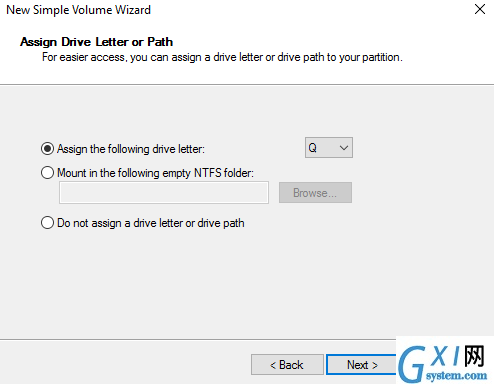
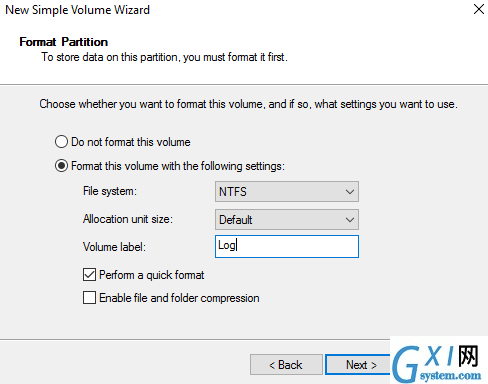
On the next page, assign a volume label and select the option to format this volume.
Finish the wizard, and it shows up the drive, as shown below.
Add the disk as a cluster resource
To add this disk as a cluster resource, open the failover cluster manager and click on Storage -> Disks. Currently, It does not show any clustered disk in the console.
Click on Add Disk, and it shows up the virtual disk we created earlier.
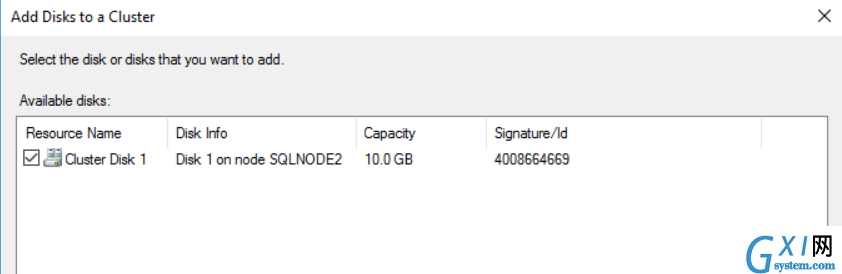
It adds the cluster disk in the failover cluster manager as shown below.
Cluster Quorum configuration
Quorum is an essential and critical component of a Windows failover cluster. A quorum keeps running the failover cluster based on the majority of votes in the group. It uses a voting mechanism to check for the node’s majority. It also helps to avoid a split-brain scenario where none of the nodes owns the resources.
We have the following quorum configurations in the Windows server.
- Node Majority
- Node and Disk Majority
- Node and File Share Majority
- No Majority
- Dynamic Quorum configuration
I suggest you go through the article to understand this in detail.
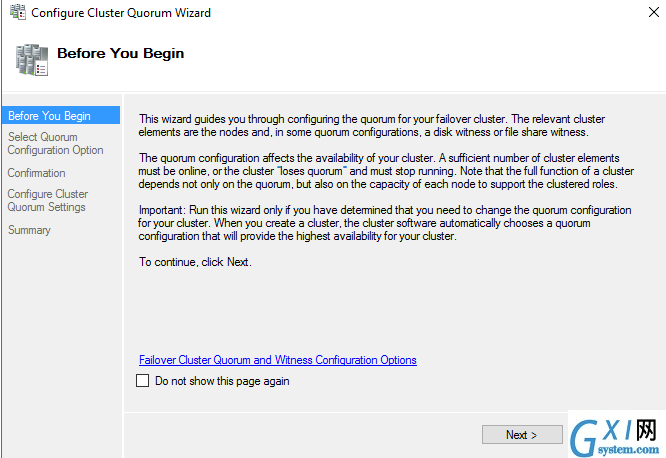
Now, right-click on the Cluster name and go to More Actions -> Configure Cluster Quorum Settings.
It launches the cluster quorum wizard with a brief introduction.
Select the option Advanced quorum configuration from the quorum confirmation options.
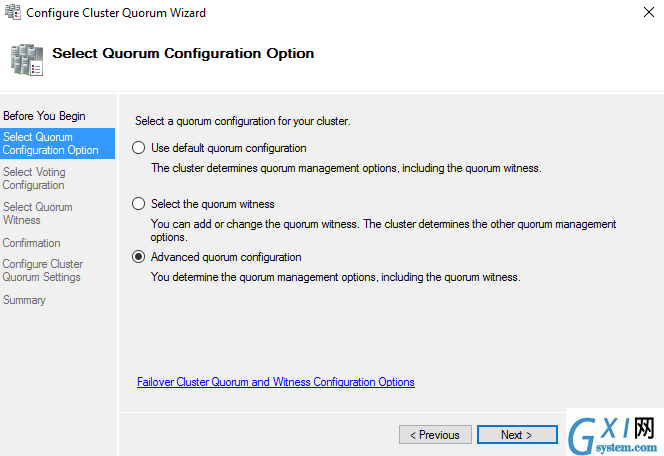
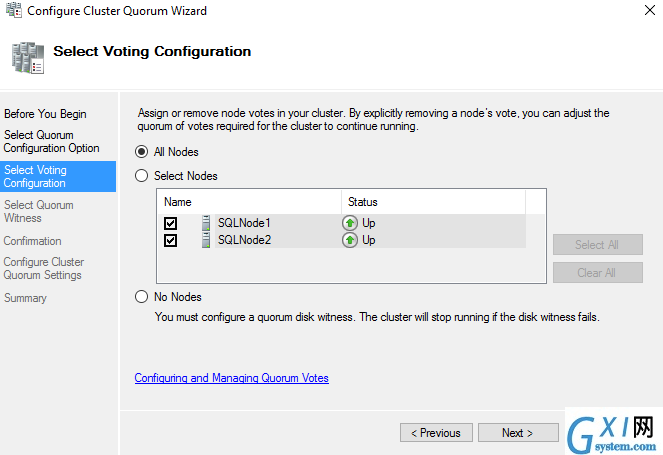
We can decide which nodes can do voting in a failover cluster configuration. By default, it selects all failover cluster nodes for voting eligibility.
Select the file share witness as a quorum witness on the next page.
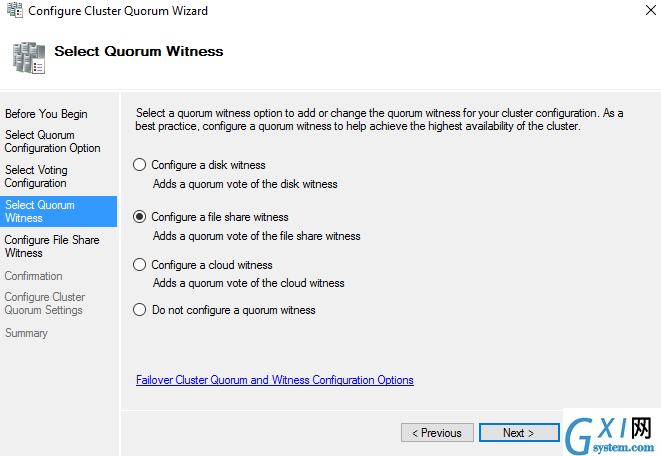
Before we proceed for the next step, create a file share in the domain controller VM and permit the Windows account by which we log in to SQL nodes. Ideally, you should not create the file share on the cluster nodes because in case that particular node goes down, file share witness also goes down.
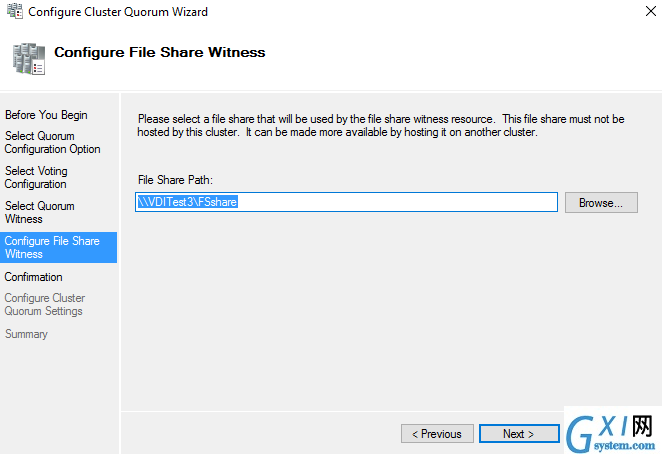
Specify the shared folder path as a file share path.
Review your configuration and confirm to proceed further.
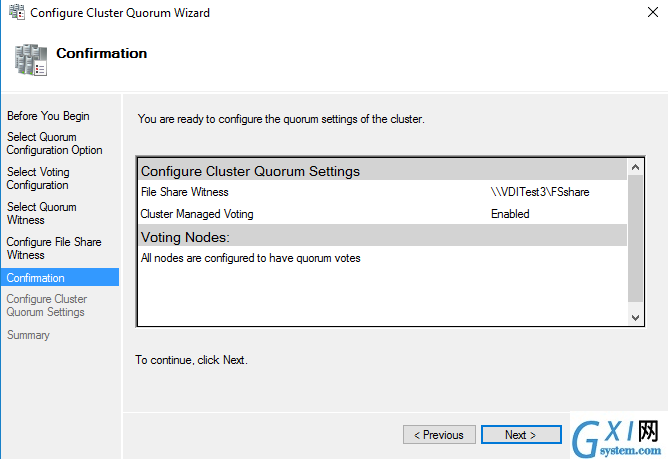
It has successfully configured the file share witness in our failover cluster configuration, as shown below.
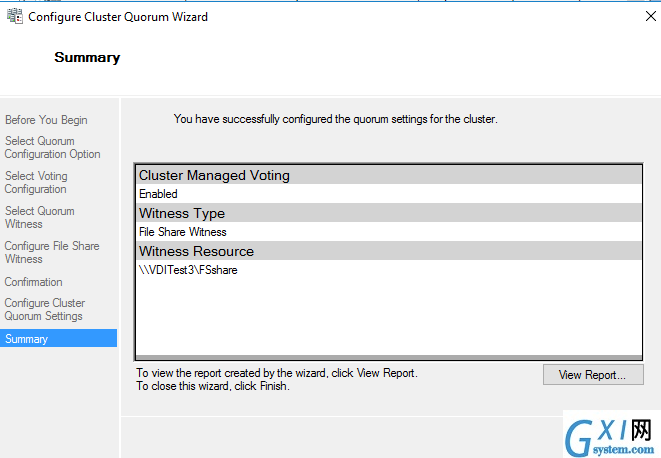
You can connect to the failover cluster manager, and it shows the file share witness in the console.
Conclusion
In this article, we configured the failover clusters on the virtual machine we created earlier. It also shows the iSCSI and file share witness quorum for SQL Server Always On Availability Groups. It completes the underlying foundation or infrastructure for always on configuration. In the next article, we will install SQL Server 2019 and configure an AG group.


本类排行
今日推荐
-
无限Wifi伴侣精简版

版本:v1.1.62
大小:31.4M
日期:2024-05-02
-
电池防爆大师经典版

版本:v1.0.2
大小:17.7M
日期:2024-05-02
-
韩语入门免费版

版本:v5.4.3
大小:27.03MB
日期:2024-05-02
-
极速管家清理免费版

版本:v1.0.0
大小:21.2M
日期:2024-05-02
-
手机垃圾清理加速器官方版

版本:v8.0
大小:18.9M
日期:2024-05-02
-
启音在线官方版

版本:v3.8.15
大小:47.26 MB
日期:2024-05-02
热门手游
-
勇夺世界杯破解版

版本:1.0.2
大小:41.08MB
日期:2024-05-02
-
有趣的棒球官方版

版本:1.132
大小:57.87MB
日期:2024-05-02
-
篮球世界模拟器手机版

版本:1.0
大小:221.18MB
日期:2024-05-02
-
点球达人2免费版

版本:0.5.3
大小:89.27MB
日期:2024-05-02
-
fifa online4手机版

版本:1.2302.0002
大小:533.58MB
日期:2024-05-02
-
晴明传官方版

版本:0.1.16
大小:1.2GB
日期:2024-05-02