区块链 Hello World -- 基于以太坊的投票Dapp
时间:2022-03-13 20:29
指路牌
- 以太坊
- 区块链
- Dapp
- 以太坊hello world
环境
windows 10 64bit
参考博客
youclavier --
背景
准备接手一个IPFS+Ethereum的项目,先学习一下Ethereum,并尝试完成一个Hello World。
步骤
- 参考我另一片blog,
- 安装node 9.11.1 并切换环境
nvm install 9.11.1 nvm use 9.11.1 - 创建一个新的工作目录,并在命令行索引到该路径
- 安装ganche-cli、web3、solc
npm install ganache-cli
npm install web3@0.20.1
npm install solc@0.4.21       //此处原博客没有版本,会安装高于0.4的版本,会导致后续编译smart contract编译失败
在安装了ganache-cli与web3时,由于教程版本问题会出现报错,但是不影响。
- 启动ganache-cli
node_modules\.bin\ganache-cli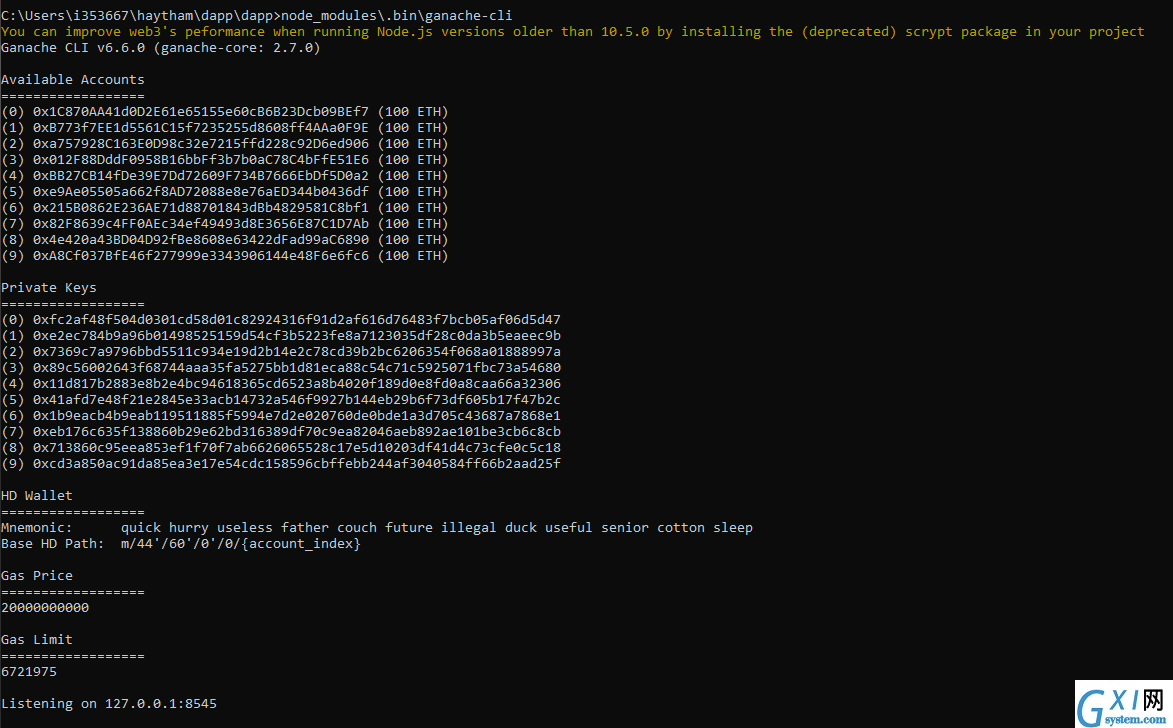
- 使用Solidity创建Smart Contract,命名为:Voting.sol
pragma solidity ^0.4.18;
contract Voting {
mapping (bytes32 => uint8) public votesReceived;
bytes32[] public candidateList;
function Voting(bytes32[] candidateNames) public {
candidateList = candidateNames;
}
function totalVotesFor(bytes32 candidate) view public returns (uint8) {
require(validCandidate(candidate));
return votesReceived[candidate];
}
function voteForCandidate(bytes32 candidate) public {
require(validCandidate(candidate));
votesReceived[candidate] += 1;
}
function validCandidate(bytes32 candidate) view public returns (bool) {
for(uint i = 0; i < candidateList.length; i++) {
if (candidateList[i] == candidate) {
return true;
}
}
return false;
}}
7. 启动node交互控制台,依次输入以下命令Web3 = require(‘web3‘)
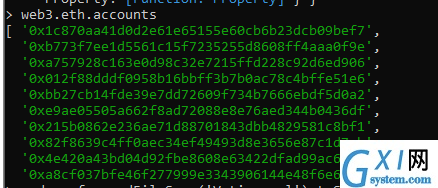
web3 = new Web3(new Web3.providers.HttpProvider(""))
web3.eth.accounts输入以上最后一条命令后会获取Ganache创建的10个帐号,如下
> code = fs.readFileSync(‘Voting.sol‘).toString()
> solc = require(‘solc‘)
> compiledCode = solc.compile(code)
全部完成会得到如下截图的输出,表示smart contract编译成功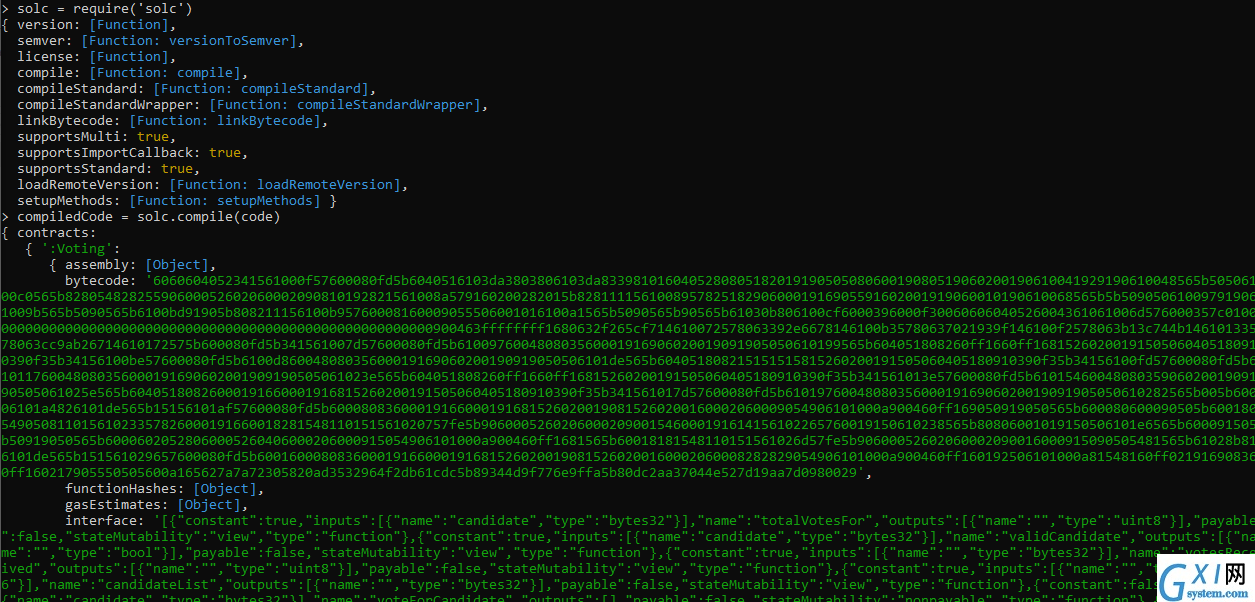
8.部署smart contract
> abi = JSON.parse(compiledCode.contracts[‘:Voting‘].interface)
> VotingContract = web3.eth.contract(abi)
> byteCode = compiledCode.contracts[‘:Voting‘].bytecode
> deployedContract = VotingContract.new([‘James‘, ‘Norah‘, ‘Jones‘],{data: byteCode, from: web3.eth.accounts[0], gas: 4700000})
> deployedContract.address
此时会获取address,记下来后续会用到
contractInstance = VotingContract.at(deployedContract.address)
- 下载web3.js文件,下载后放在工作根目录下。
由cdn不知什么原因不可用,所以直接下载源文件,链接如下- 在根目录下创建index.html文件,并粘贴以下代码,需要在截图标出处,更换成第8步自己部署的smart contract的address
<!DOCTYPE html>
<html>
<head>
<title>DApp</title>
<link href=‘https://fonts.googleapis.com/css?family=Open Sans:400,700‘ rel=‘stylesheet‘ type=‘text/css‘>
<link href=‘https://maxcdn.bootstrapcdn.com/bootstrap/3.3.7/css/bootstrap.min.css‘ rel=‘stylesheet‘ type=‘text/css‘>
</head>
<body class="container">
<h1>Voting Application</h1>
<div class="table-responsive">
<table class="table table-bordered">
<thead>
<tr>
<th>Candidate</th>
<th>Votes</th>
</tr>
</thead>
<tbody>
<tr>
<td>James</td>
<td id="candidate-1"></td>
</tr>
<tr>
<td>Norah</td>
<td id="candidate-2"></td>
</tr>
<tr>
<td>Jones</td>
<td id="candidate-3"></td>
</tr>
</tbody>
</table>
</div>
<input type="text" id="candidate" />
<a href="#" onclick="voteForCandidate()" class="btn btn-primary">Vote</a>
</body>
<script src="web3.js"></script>
<script src="https://code.jquery.com/jquery-3.1.1.slim.min.js"></script>
<script language="javascript" type="text/javascript">
    web3 = new Web3(new Web3.providers.HttpProvider("http://localhost:8545"));
    abi = JSON.parse(‘[{"constant":false,"inputs":[{"name":"candidate","type":"bytes32"}],"name":"totalVotesFor","outputs":[{"name":"","type":"uint8"}],"payable":false,"type":"function"},{"constant":false,"inputs":[{"name":"candidate","type":"bytes32"}],"name":"validCandidate","outputs":[{"name":"","type":"bool"}],"payable":false,"type":"function"},{"constant":true,"inputs":[{"name":"","type":"bytes32"}],"name":"votesReceived","outputs":[{"name":"","type":"uint8"}],"payable":false,"type":"function"},{"constant":true,"inputs":[{"name":"x","type":"bytes32"}],"name":"bytes32ToString","outputs":[{"name":"","type":"string"}],"payable":false,"type":"function"},{"constant":true,"inputs":[{"name":"","type":"uint256"}],"name":"candidateList","outputs":[{"name":"","type":"bytes32"}],"payable":false,"type":"function"},{"constant":false,"inputs":[{"name":"candidate","type":"bytes32"}],"name":"voteForCandidate","outputs":[],"payable":false,"type":"function"},{"constant":true,"inputs":[],"name":"contractOwner","outputs":[{"name":"","type":"address"}],"payable":false,"type":"function"},{"inputs":[{"name":"candidateNames","type":"bytes32[]"}],"payable":false,"type":"constructor"}]‘)
    VotingContract = web3.eth.contract(abi);
    contractInstance = VotingContract.at(‘0x47f49b300eb86d972f91f103913376fb0a8e52e7‘);
    candidates = {"James": "candidate-1", "Norah": "candidate-2", "Jones": "candidate-3"}

    function voteForCandidate(candidate) {
        candidateName = $("#candidate").val();
        try {
            contractInstance.voteForCandidate(candidateName, {from: web3.eth.accounts[0]}, function() {
            let div_id = candidates[candidateName];
            $("#"+div_id).html(contractInstance.totalVotesFor.call(candidateName).toString());
        });
        } catch (err) {
        }
    }

    $(document).ready(function() {
        candidateNames = Object.keys(candidates);
        for (var i = 0; i < candidateNames.length; i++) {
            let name = candidateNames[i];
            let val = contractInstance.totalVotesFor.call(name).toString()
            $("#"+candidates[name]).html(val);
        }
    });
</script>
</html>

11. 在浏览器打开index.html,输入Candidate中的人名后,点击Vote即可投票,投票后效果如下

每次点击投票,也都会生成一个新的区块,效果如下。

## 后记
以上步骤就完成了一个基于Ethereum的投票Dapp的完整搭建流程,整合个补全后步骤应该不会有坑的可以顺利搭建完成。
就像“hello world”的字面意思一样,0-1的过程是最艰难的,但是开了头,剩下的1-n也就会顺畅不少。
####
***要获取更多Haytham原创文章,请关注公众号"许聚龙":***
相关推荐
- Android系统编程入门系列之界面Activity交互响应
- 新型横向移动工具原理分析、代码分析、优缺点以及检测方案
- uni-app滚动视图容器(scroll-view)之监听上拉事件
- uniapp h5,app两端复制文本
- Android系统编程入门系列之界面Activity响应丝滑的传统动画
- 【Azure 应用服务】App Service 配置 Application Settings 访问Storage Account得到 could not be resolved: '*.file.core.windows.net'的报错。没有解析成对应中国区 Storage Account地址 *.file.core.chinacloudapi.cn
- 诺基亚短信生成!太好玩了
- iOS 跳转App Store进行评分
- 开发一个即时通讯App
- 关闭苹果IOS app自动更新
电脑软件


本类排行
- 1关闭苹果IOS app自动更新
- 2iOS 跳转App Store进行评分
- 3诺基亚短信生成!太好玩了
- 4Android系统编程入门系列之界面Activity响应丝滑的传统动画
- 5uniapp h5,app两端复制文本
- 6uni-app滚动视图容器(scroll-view)之监听上拉事件
- 7新型横向移动工具原理分析、代码分析、优缺点以及检测方案
- 8Android系统编程入门系列之界面Activity交互响应
- 9开发一个即时通讯App
- 10【Azure 应用服务】App Service 配置 Application Settings 访问Storage Account得到 could not be resolved: '*.file.core.windows.net'的报错。没有解析成对应中国区 Storage Account地址 *.file.core.chinacloudapi.cn
今日推荐
-
保险考试题库完整版

版本:v5.0.5
大小:49.95MB
日期:2024-05-31
-
公安基础知识刷题狗正版

版本:v1.0.0
大小:28.11MB
日期:2024-05-31
-
科目二练车模拟官方版

版本:v1.0.0
大小:42.07MB
日期:2024-05-31
-
出租车资格证题库正式版

版本:v5.0.5
大小:49.97MB
日期:2024-05-31
-
货车帮货主完整版

版本:v1.0
大小:未知
日期:2024-05-31
-
消费保投诉中心正式版

版本:v9.2.5
大小:23.3M
日期:2024-05-31